In this guide, we’ll explore how to create a scalable, high-performance app using SvelteKit tRPC. We’ll cover everything from setting up a project to building a structured architecture to ensure smooth growth and maintainability over time. By the end, you’ll know how to set up a modular, efficient SvelteKit and tRPC app that can easily handle expanding features and increased complexity.
Overview
Our example app will fetch coffee data from a sample API, allowing users to switch between hot and iced coffee options. We’ll use SvelteKit for the front end and tRPC to handle our API, building a recommended structure to support larger projects.
Since I want you to learn while coding, I’ll provide screenshots of the code instead of direct copy-paste snippets. Writing the code yourself will help reinforce the concepts. However, if you prefer to get started quickly, you can clone the project from the GitHub repository linked at the end of this guide.
1. Setting Up the SvelteKit Project
To start, we need a new SvelteKit project. Open your terminal and run the following commands:
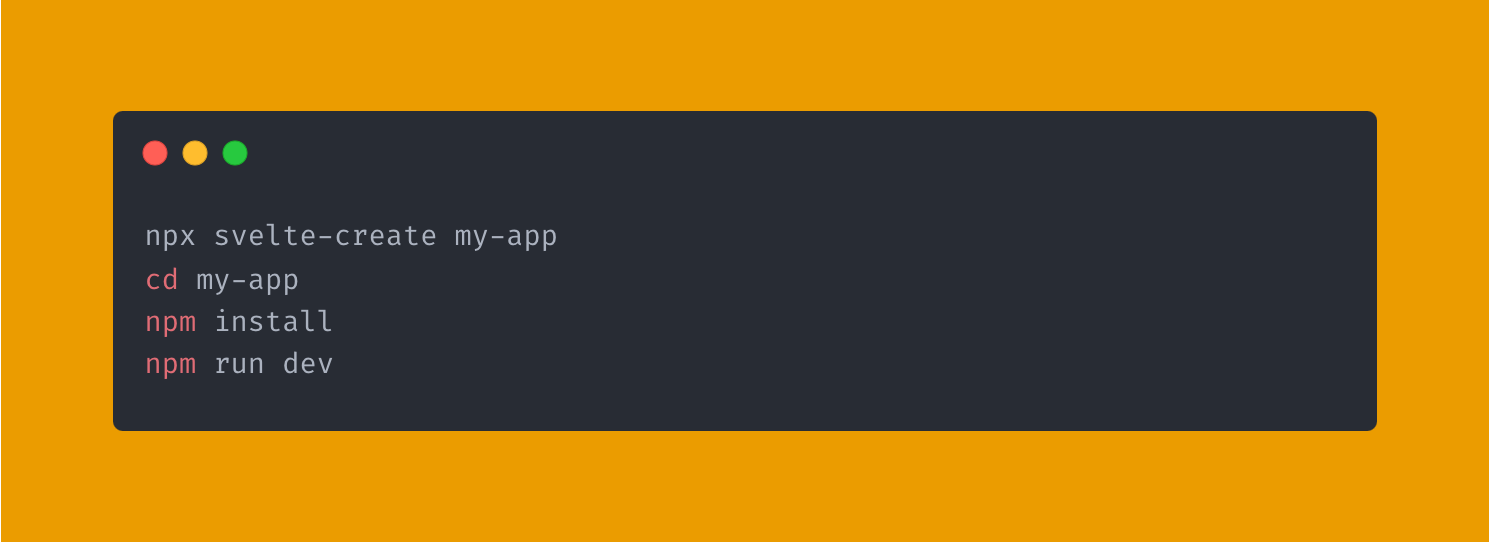
You should now have a basic SvelteKit project running locally.
2. Installing tRPC and Zod
We’ll use tRPC and Zod for type-safe API calls for schema validation.

These libraries will allow us to build type-safe, end-to-end APIs with minimal boilerplate.
3. Creating a Modular Folder Structure
A well-organized project is crucial for scalability. Let’s create a folder structure to keep our code modular and maintainable.
a. Create a server Folder:
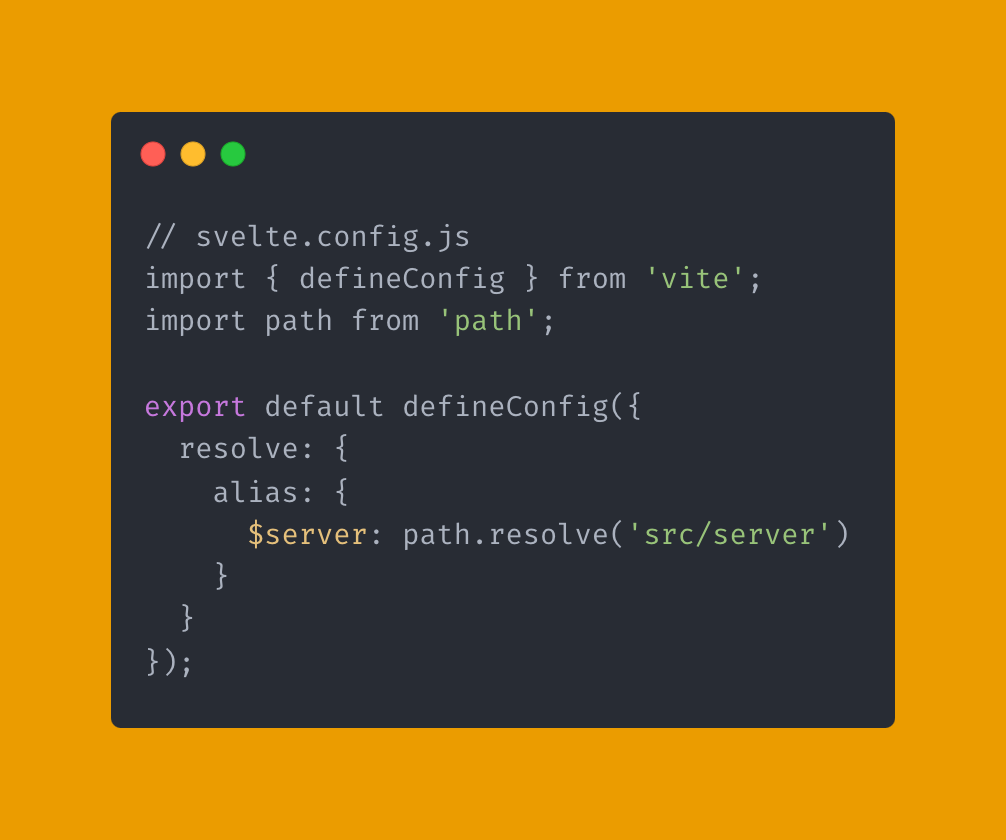
Inside the src folder, add a new folder named server. Then, add an alias $server in svelte.config.js to make it easier to reference files.
b. Create Subfolders in server folder:
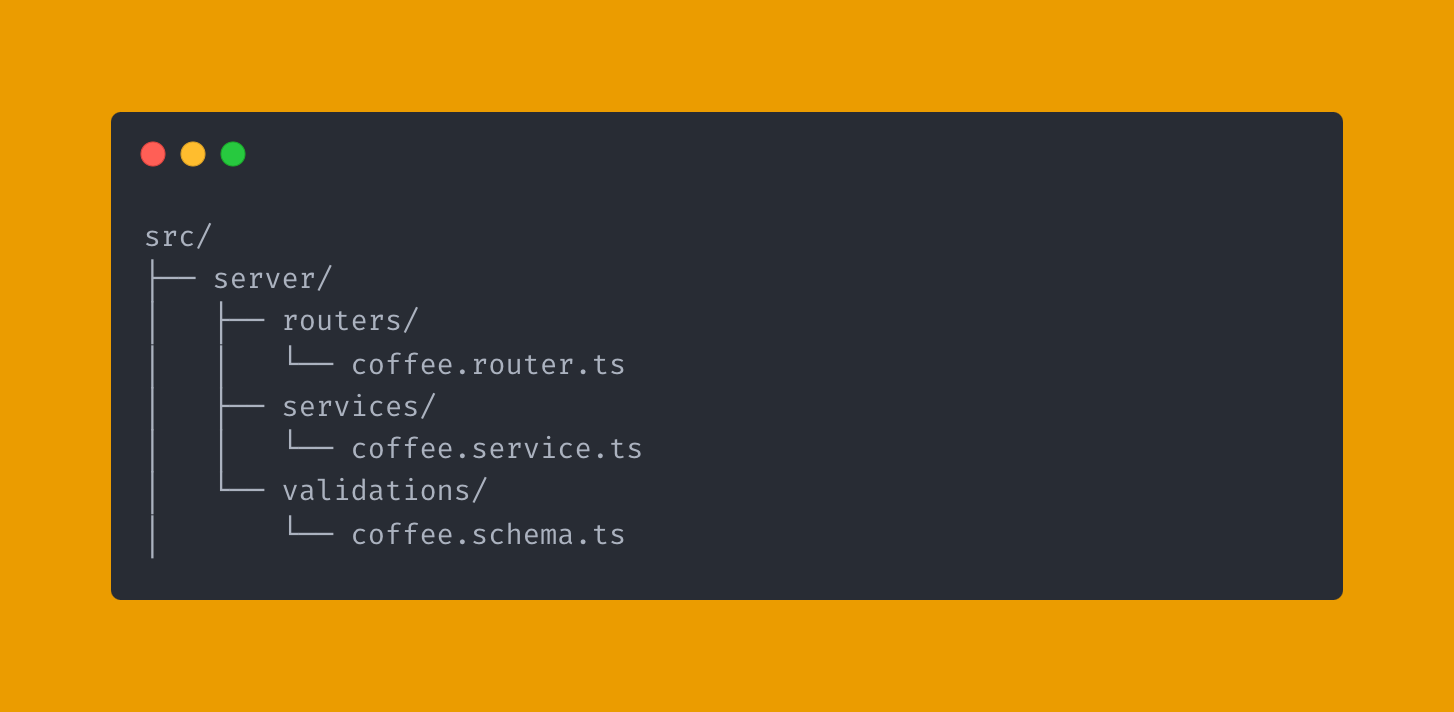
In the server folder, add three subfolders: routers, services, and validations.
• Routers will hold our tRPC routers.
• Services will contain business logic.
• Validations will include Zod schemas for data validation.
c. Setting Up tRPC Context and Routers
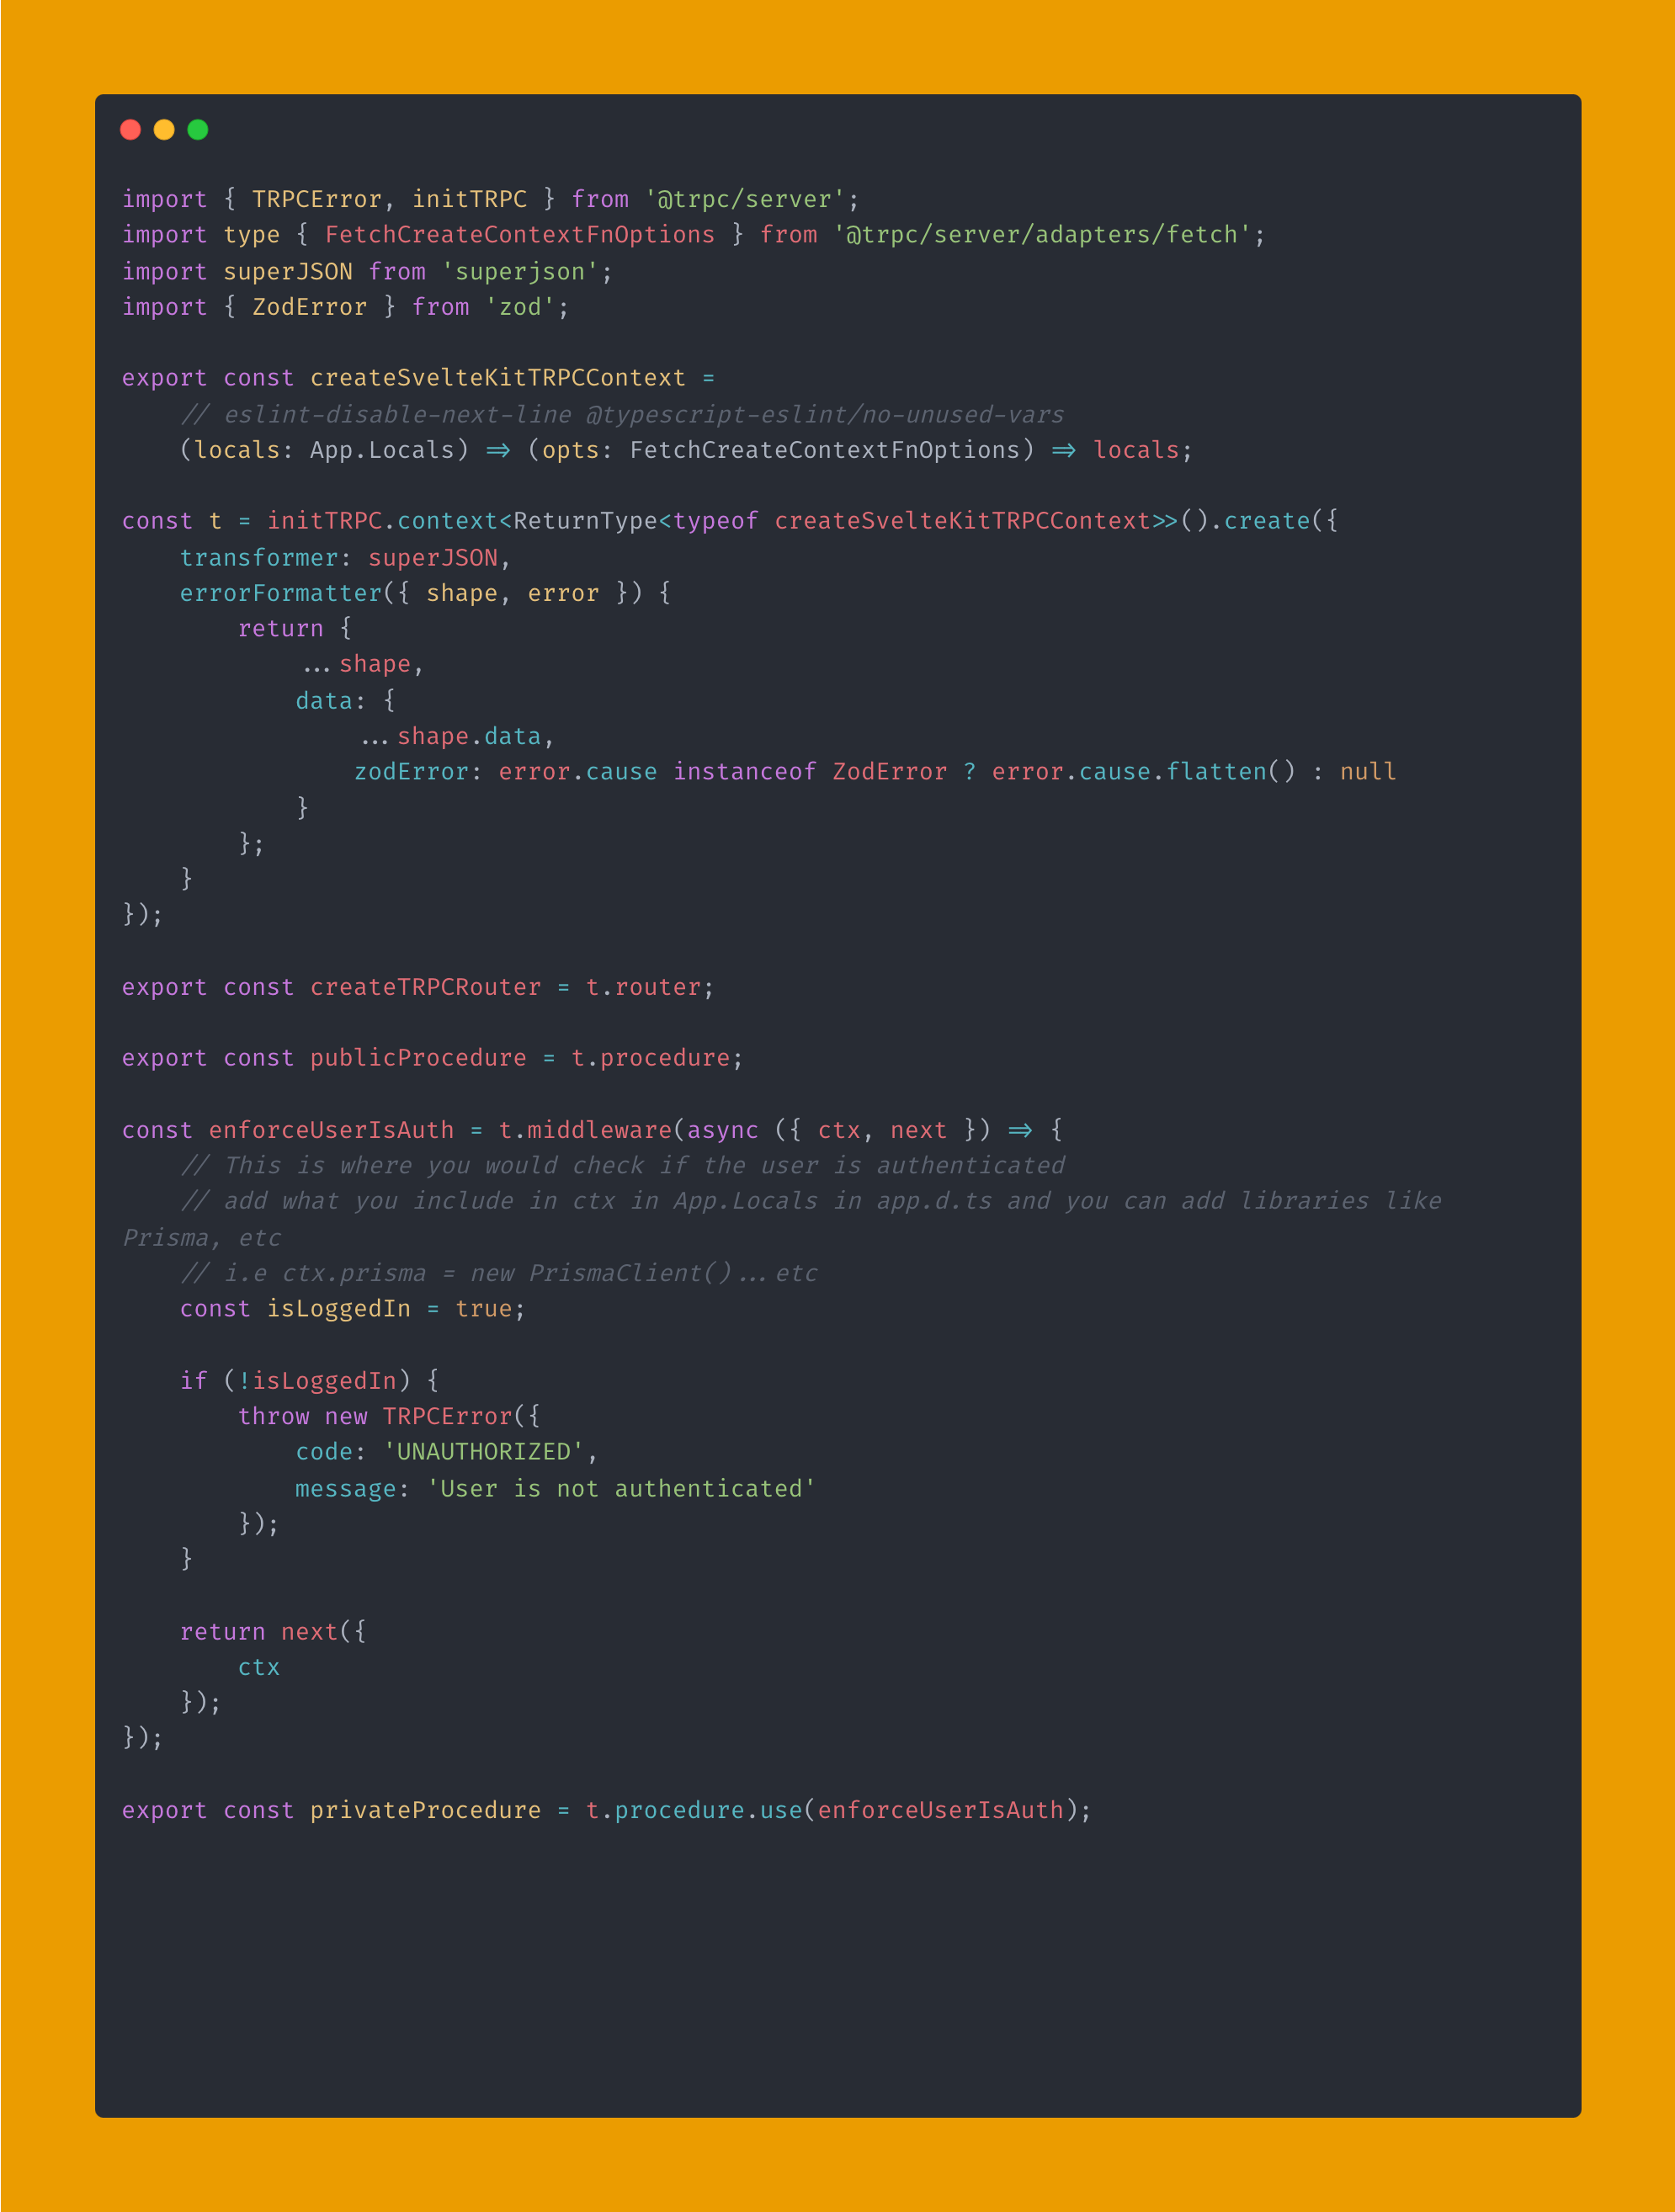
Create trpcContext.ts
In src/server, create a file called trpcContext.ts to configure our tRPC context. This file will hold any shared context data, such as authentication or database connections, that our tRPC procedures may need.
Create appRouter.ts
Next, set up the main router file in src/server. This router will gather and export all other routers in our app.
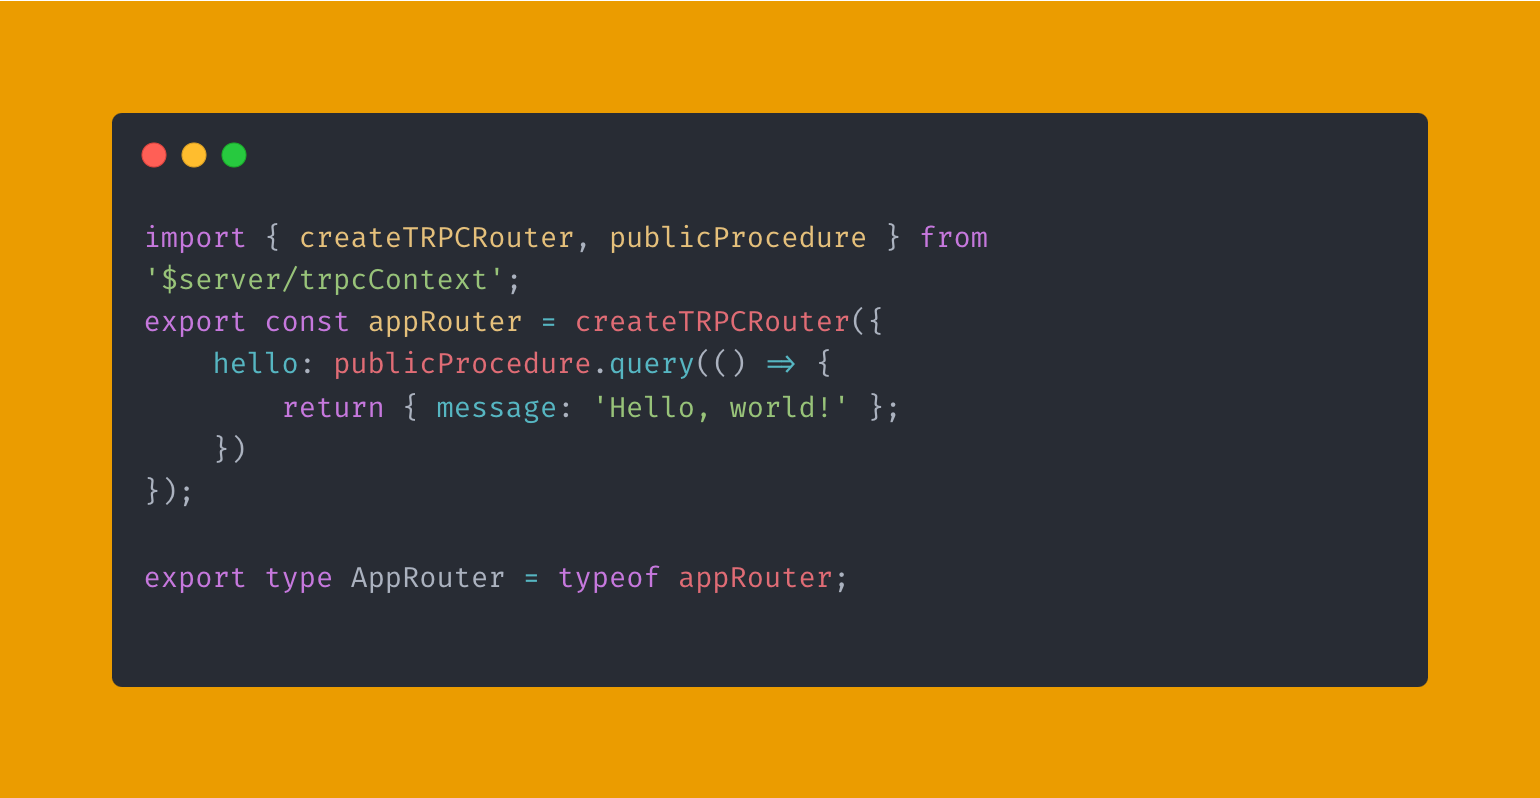
In our example, we’ll set up a simple hello procedure to test the setup.
d. Integrating tRPC with SvelteKit
To make tRPC work with SvelteKit, we’ll create a catch-all API route to handle our tRPC procedures.
1. Create a route file at src/routes/api/trpc/[...procedure].ts.
2. Import the necessary modules and create a request handler.
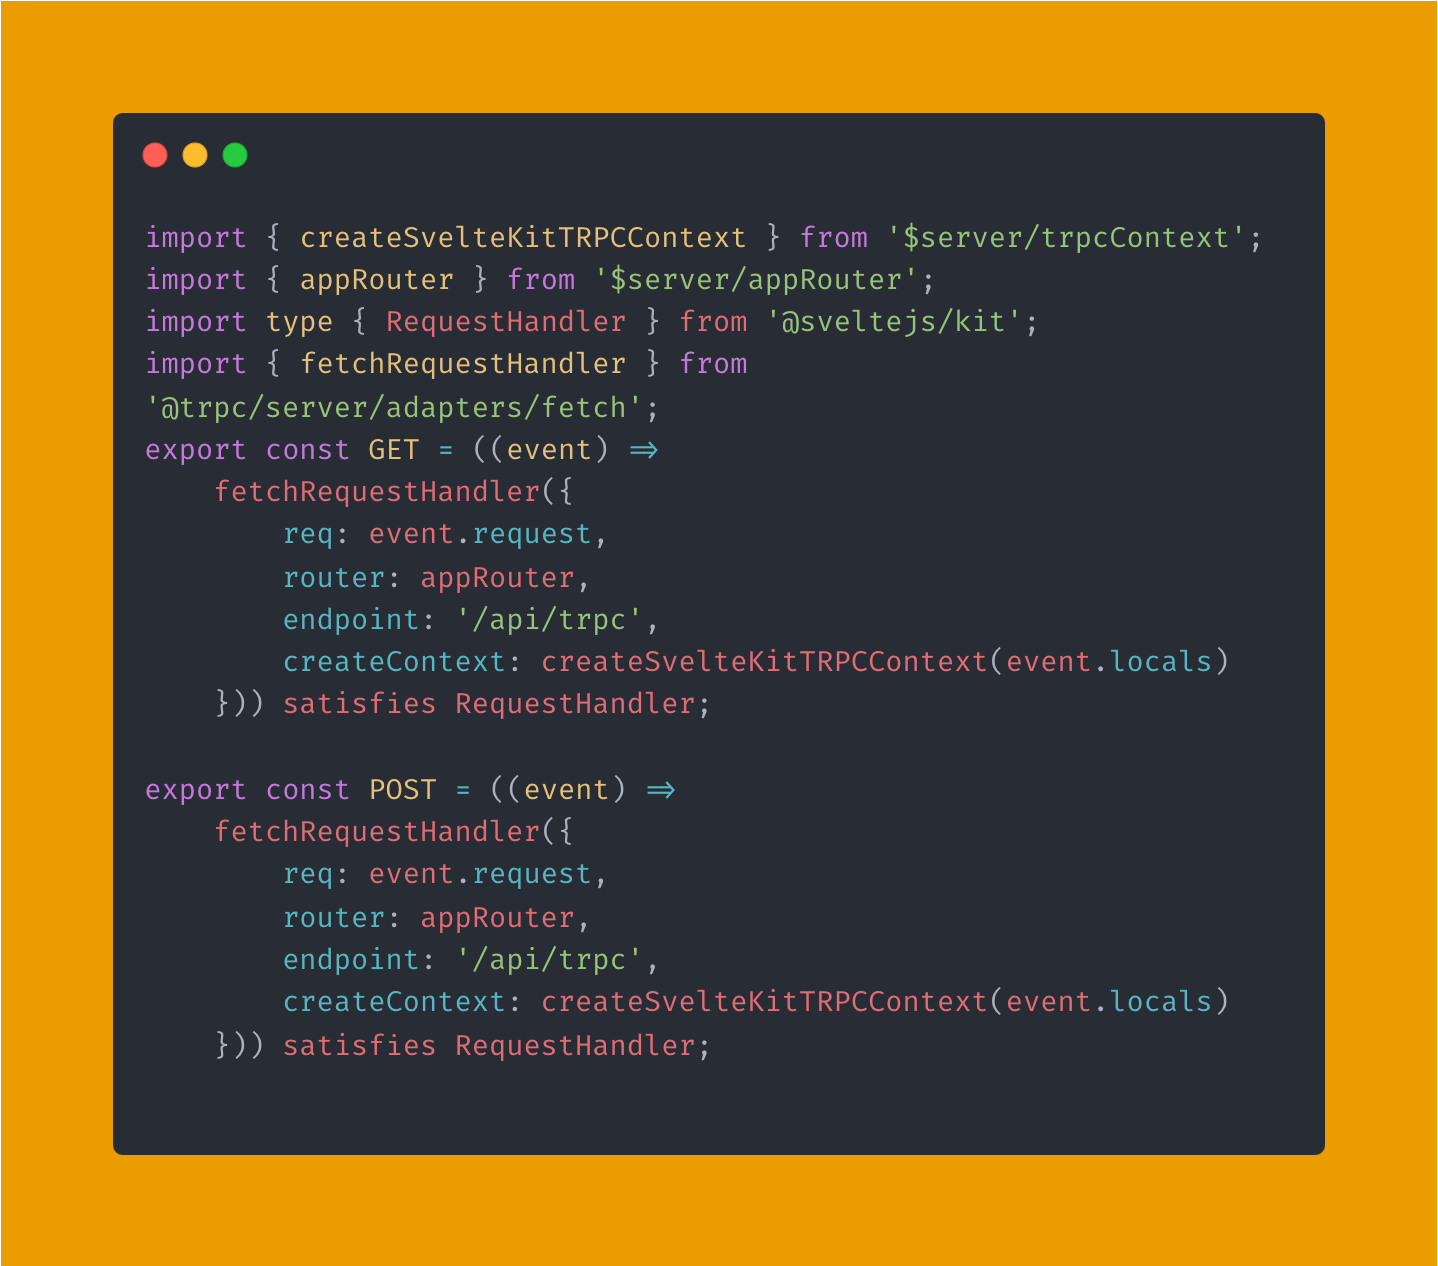
This setup captures all requests under /api/trpc and forwards them to our tRPC server.
e. Creating the Client
On the client side, we’ll set up the tRPC client to call our API.
1. In src/lib (or another preferred folder), create a file called trpc.ts.
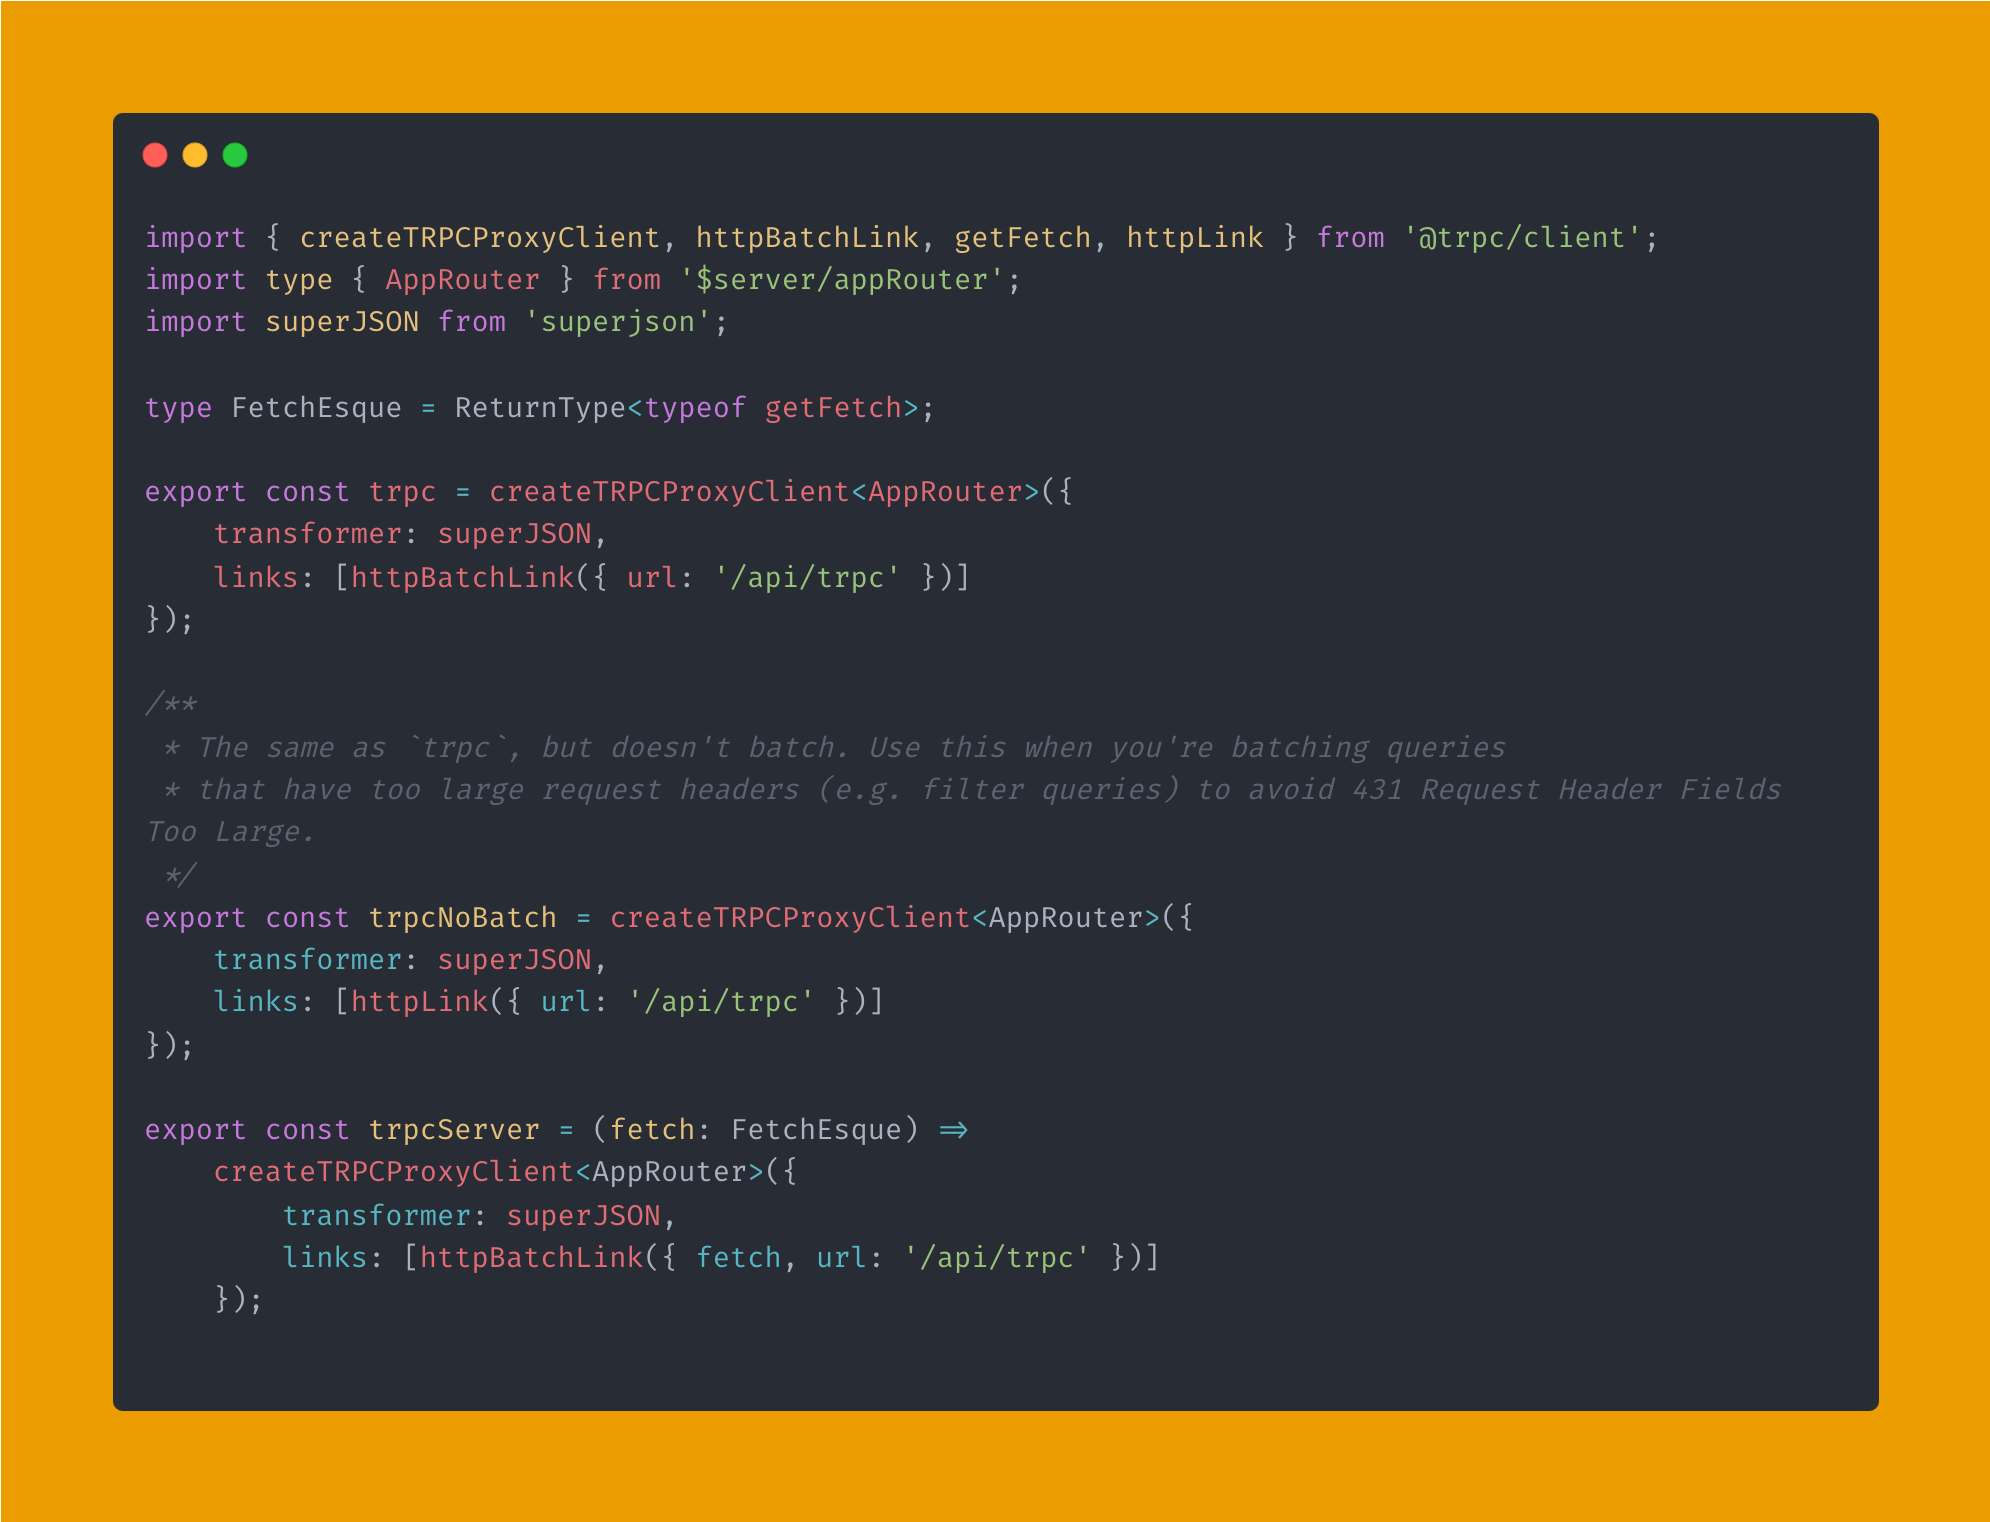
Now you can import this client wherever you need to use your tRPC endpoints.
f. Using Queries and Procedures
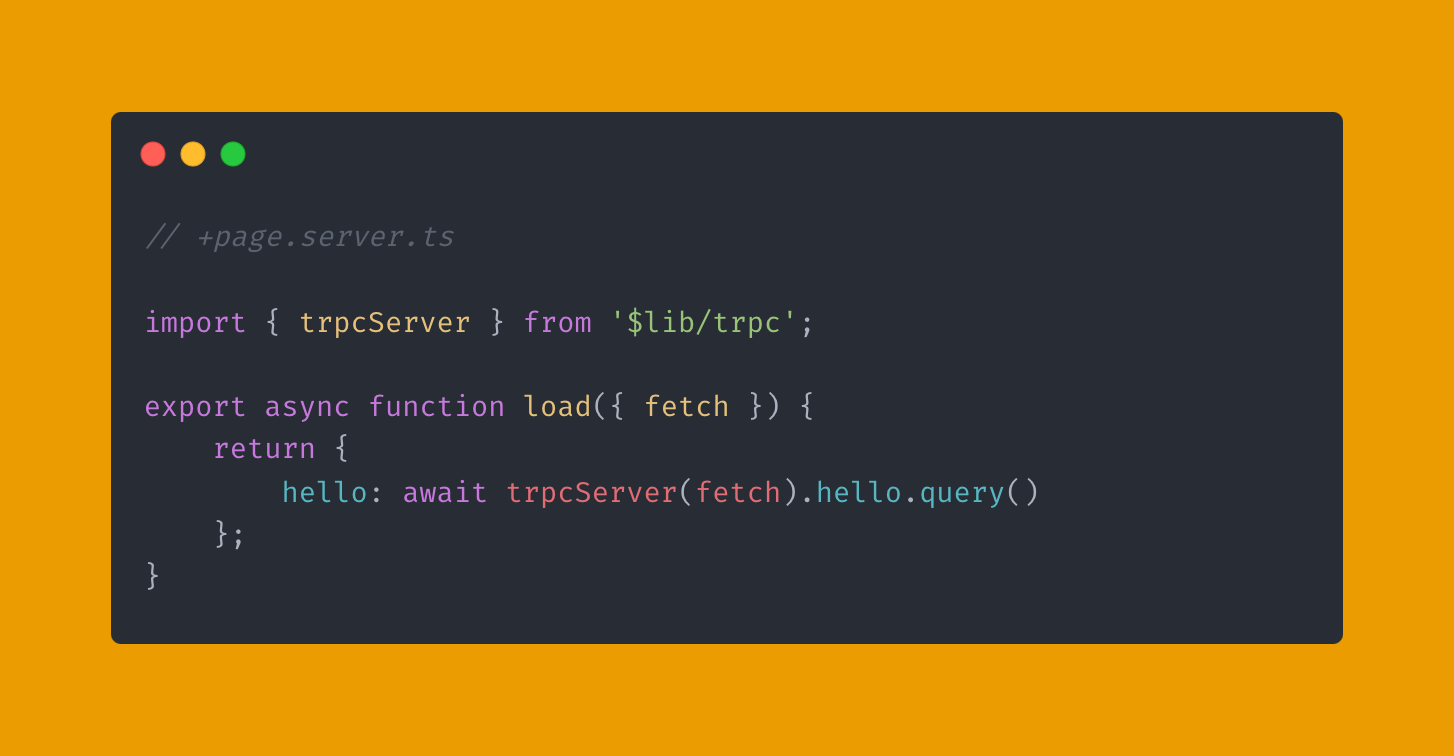
To use our coffee router and procedures, import the trpc client where needed in your SvelteKit app:
I. Server-side
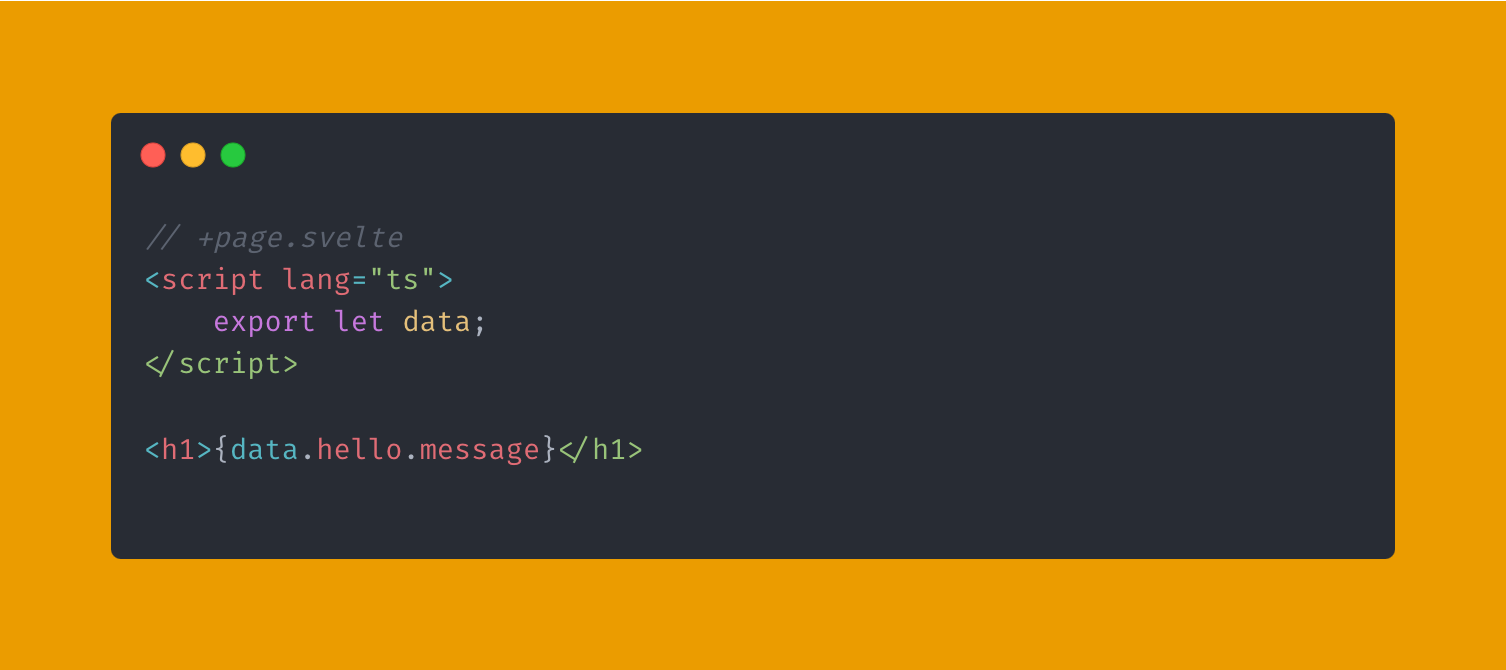
ii. Client-side
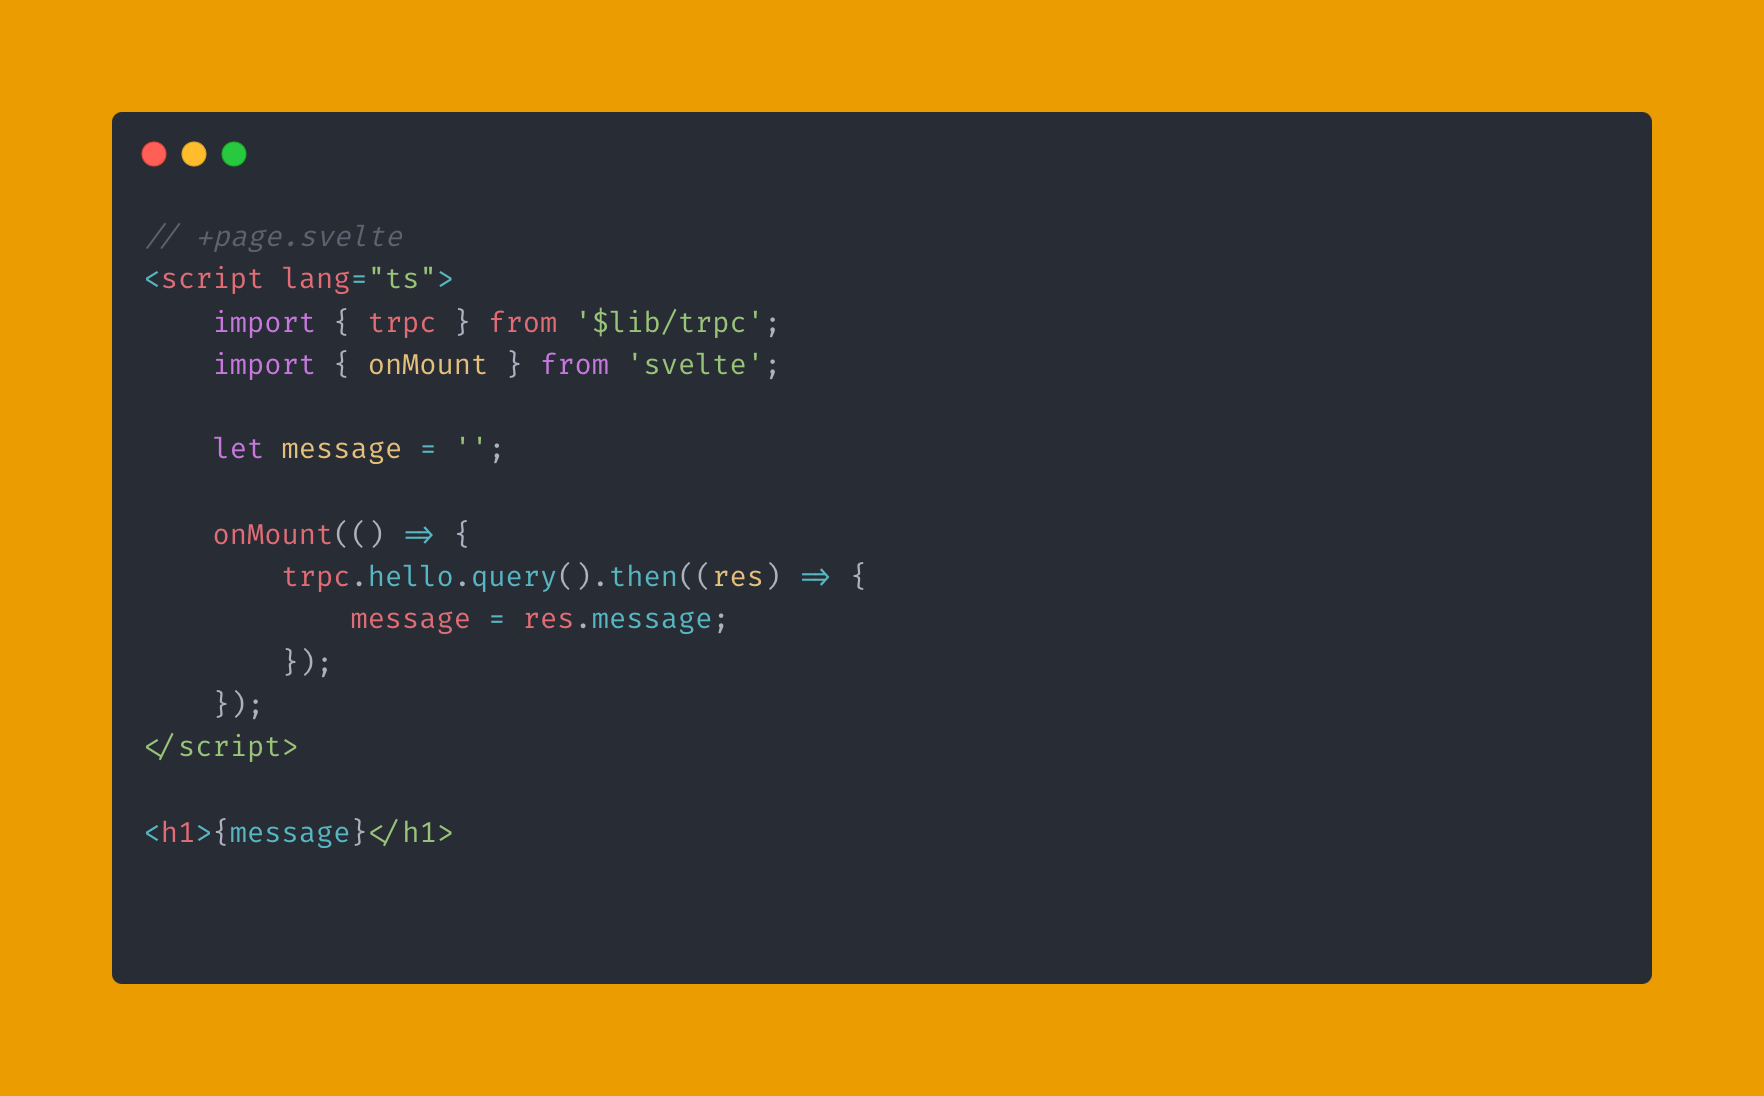
Conclusion
By following this structure, you’ve successfully built a scalable SvelteKit and tRPC project that is both modular and maintainable. This setup ensures a clear separation of concerns, making it easier to add new features and troubleshoot issues as your app evolves.
In this guide, we focused on integrating tRPC with SvelteKit, organizing modular folder structures, and configuring both server and client components. With this robust foundation, you’re well-equipped to expand your app’s capabilities and tackle large-scale projects confidently.
Explore the full source code on GitHub: SvelteKit-tRPC Repository.
Looking ahead to Part 2? It’s here! 🎉 We’ve enhanced the project by integrating the Coffee API, demonstrating how to handle dynamic data from multiple endpoints, featuring both hot and iced coffee options. This next step brings your setup to life with real-world data, paving the way for a fully interactive application.
👉 Read Part 2 now and take your SvelteKit + tRPC project to the next level.
📬 Want more updates like this? Subscribe to the newsletter below to stay in the loop with new tutorials, insights, and dev tips, straight to your inbox.
